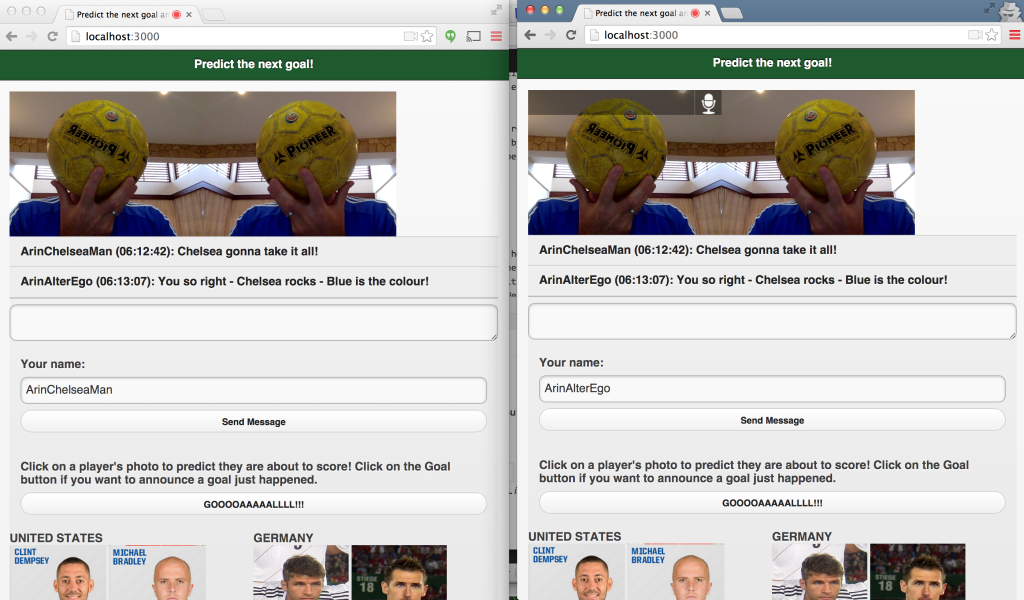
Earlier this year, as an excuse to combine work with my obsessive viewing of the World Cup, I built a simple 2nd screen application for sharing goal predictions and comments with friends during a game.
I did this as an exercise in working with PubNub, a real-time service for publish/subscribe messaging. The resulting app was simple, and fun, but left something to be desired.
While it was pretty easy to make a prediction about who would score the next goal, during the most exciting parts of the game it was hard to watch the game and also type in a comment or read what others are saying. This is where a text-based second screen experience fails.
Adding in video to the 2nd screen experience
As an excuse to show how easy it is to incorporate TokBox into your application for WebRTC based video and audio chats, in this blog post I’ll show you how to add video chat to my second screen football application.
TokBox is a paid service, so the first thing you need to do in order to follow along with this tutorial is go create a free account at their site. They also have a quick start and tutorials section on their website.
WebRTC does not require using a paid service, and you can certainly “roll your own” architecture by implementing WebRTC yourself. We prefer to use paid services like TokBox or others (PubNub also offers a WebRTC api for example that we’ve used in other places).
The advantage of a paid service is that they will handle the complexities of the WebRTC interface for you, in particular the STUN and TURN servers that help you to establish the peer to peer connection a WebRTC application is based on. If you’re not familiar with WebRTC yet, this introductory presentation may be helpful, this is the authoritative blog post, and you might also be interested in our newsletter RealTimeWeekly or our e-book on building real time web applications.
If you want to get straight to the code, then go look at the TokBoxTest branch of our “Next Goal” application.
Our “Next Goal” application is a simple Node.js app, with a single view doing all the presentation work. After creating an account with TokBox, you are going to be given some API keys, a session key, and a token. Hold onto those.
Step 1: Add in the TokBox library
This is quite simple, just put their script tag into your view
Step 2: Add in div tags to hold the video
Somewhere in your view, you need to add in a div tag or two to hold the video containers that TokBox will generate for you. In my case, I want the video displayed horizontally at the top of my application, so that it’s always visible above the text chats and goal predictions going on.
Step 3: Add in javascript to create the sessions
Relying heavily on the TokBox tutorials, I adapted this javascript for my application.
What’s going on here? Well first, remember that to get this to work you need to replace the API Key, Session ID, and token with what you get in your TokBox sample account.
After that, a session gets initialized on page load for anyone visiting the page. In a more realistic app you might let people choose to join the video chat, in our case, it’s just if you’re visiting the page then you are in the chat. After a slight delay on page load, your browser will ask for permission to turn on your camera and microphone (this is a browser requirement in the WebRTC standard for privacy and something you have no control over).
After that, there are just 3 simple events from the TokBox API that we need to subscribe to. When a connection is made we pass it our div tag for the publisher’s video so TokBox knows where to put the video. When we subscribe to someone else’s video stream, we tell TokBox to put that in our subscriber div tag.
And finally when a connection is closed, I found that I needed to recreate the Subscriber’s div tag in the DOM because the TokBox api removes it by default when a subscriber’s stream is disconnected. This allowed me to see the person come back if they refresh their page.
Seeing it in action
That’s it! There is a lot more you can do in TokBox to customize how the video tags are displayed, put names on them, show more participants, etc. And there’s certainly still a lot more we could be doing in our NextGoal application to make it a compelling 2nd screen experience. But I hope you see the basics of adding in a WebRTC connection using TokBox.


